- Creating a custom Shopify app and sharing credentials with Layers support.
- Exporting and importing seed search data for your store.
Part 1: Create a Custom App on Shopify
To connect your demo store to Layers, you’ll need to create a Custom App on Shopify.-
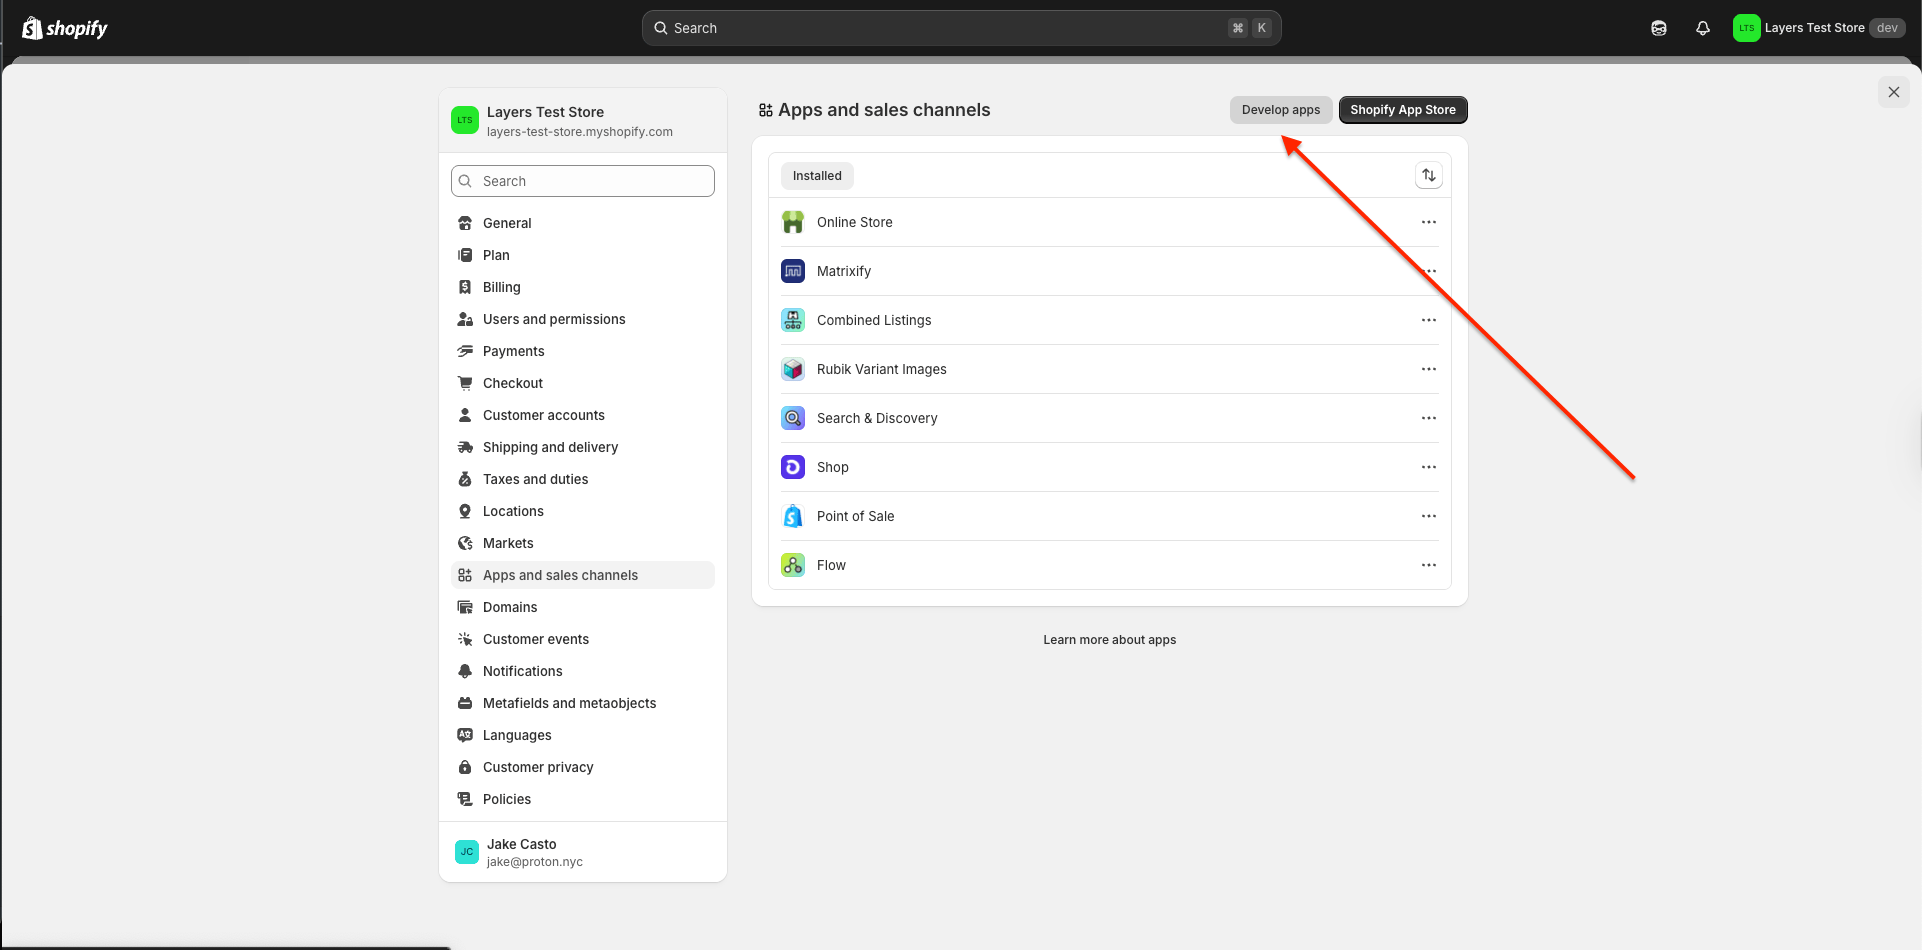
Navigate to Settings > Apps and Sales Channels > Develop Apps
in your Shopify admin.

-
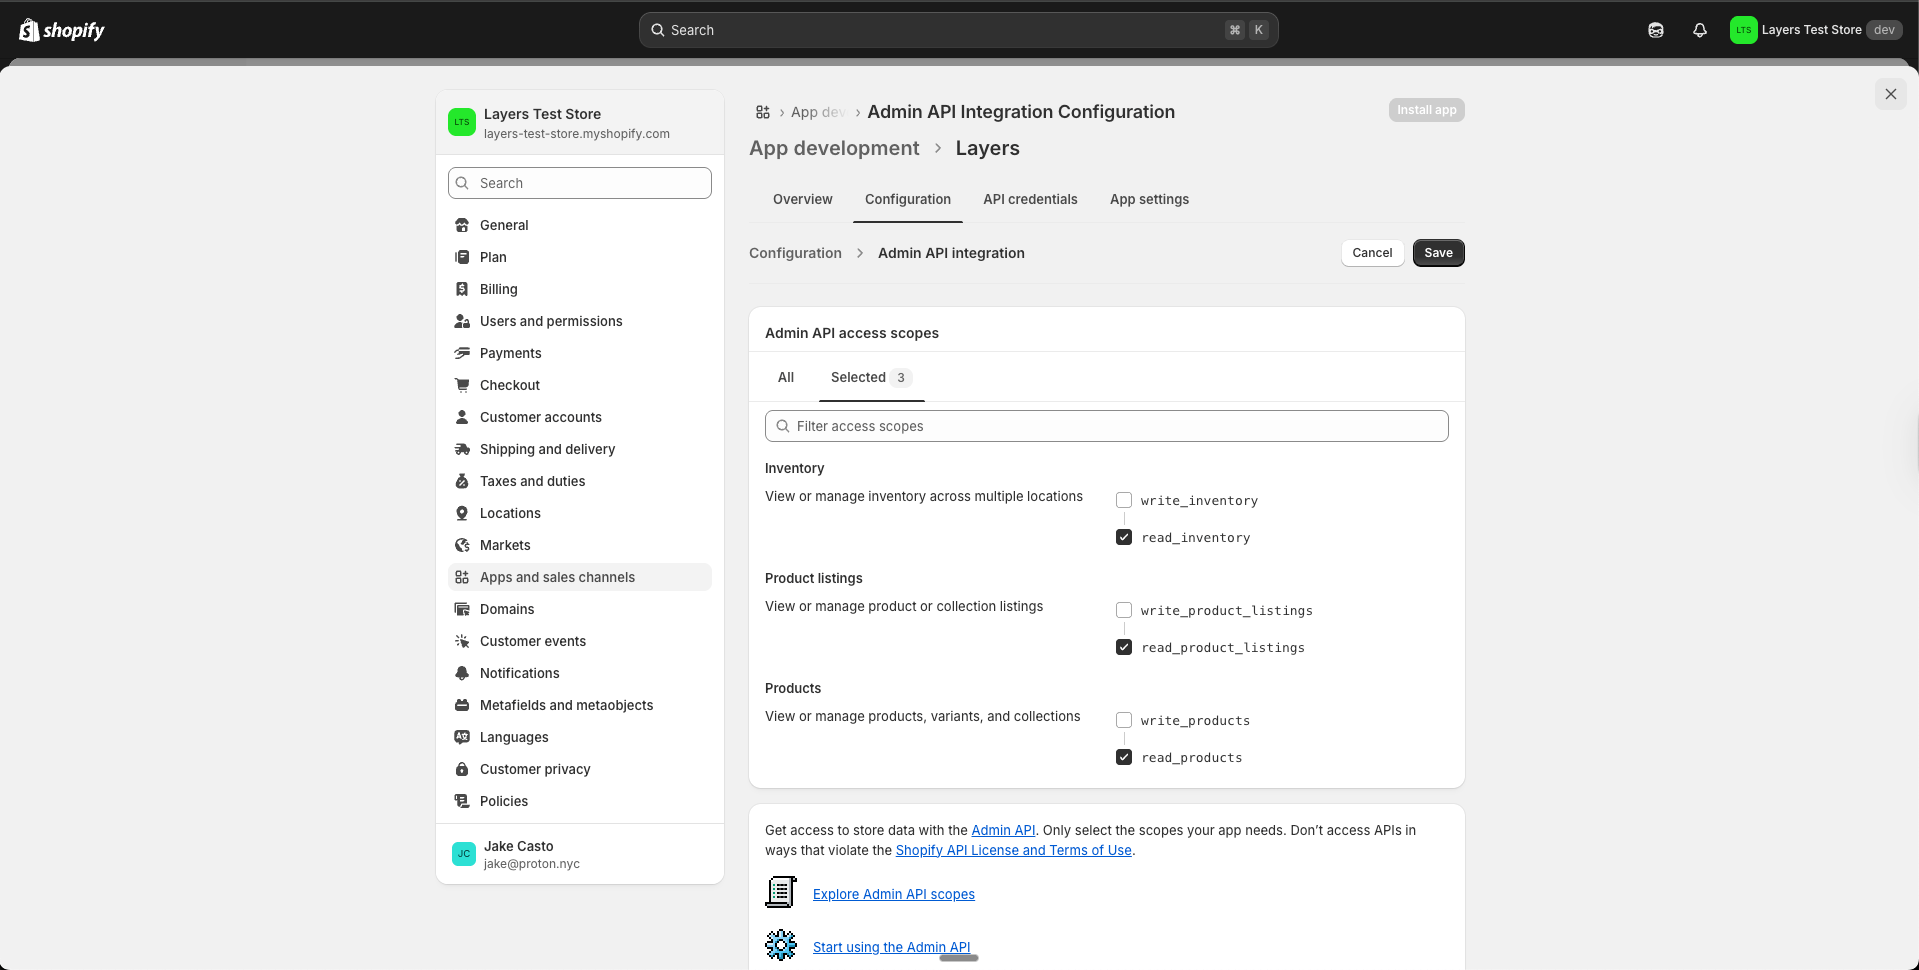
Create a new Custom App and set the following access scopes:
read_productsread_product_listingsread_inventory

-
Copy and send the following to Layers Support:
-
Your shop domain (ending in
.myshopify.com) - The secret access key
💡 In production, this app would also be connected to AWS EventBridge for real-time event streaming.
-
Your shop domain (ending in
Part 2: (Optional) Create a Crawler Signature
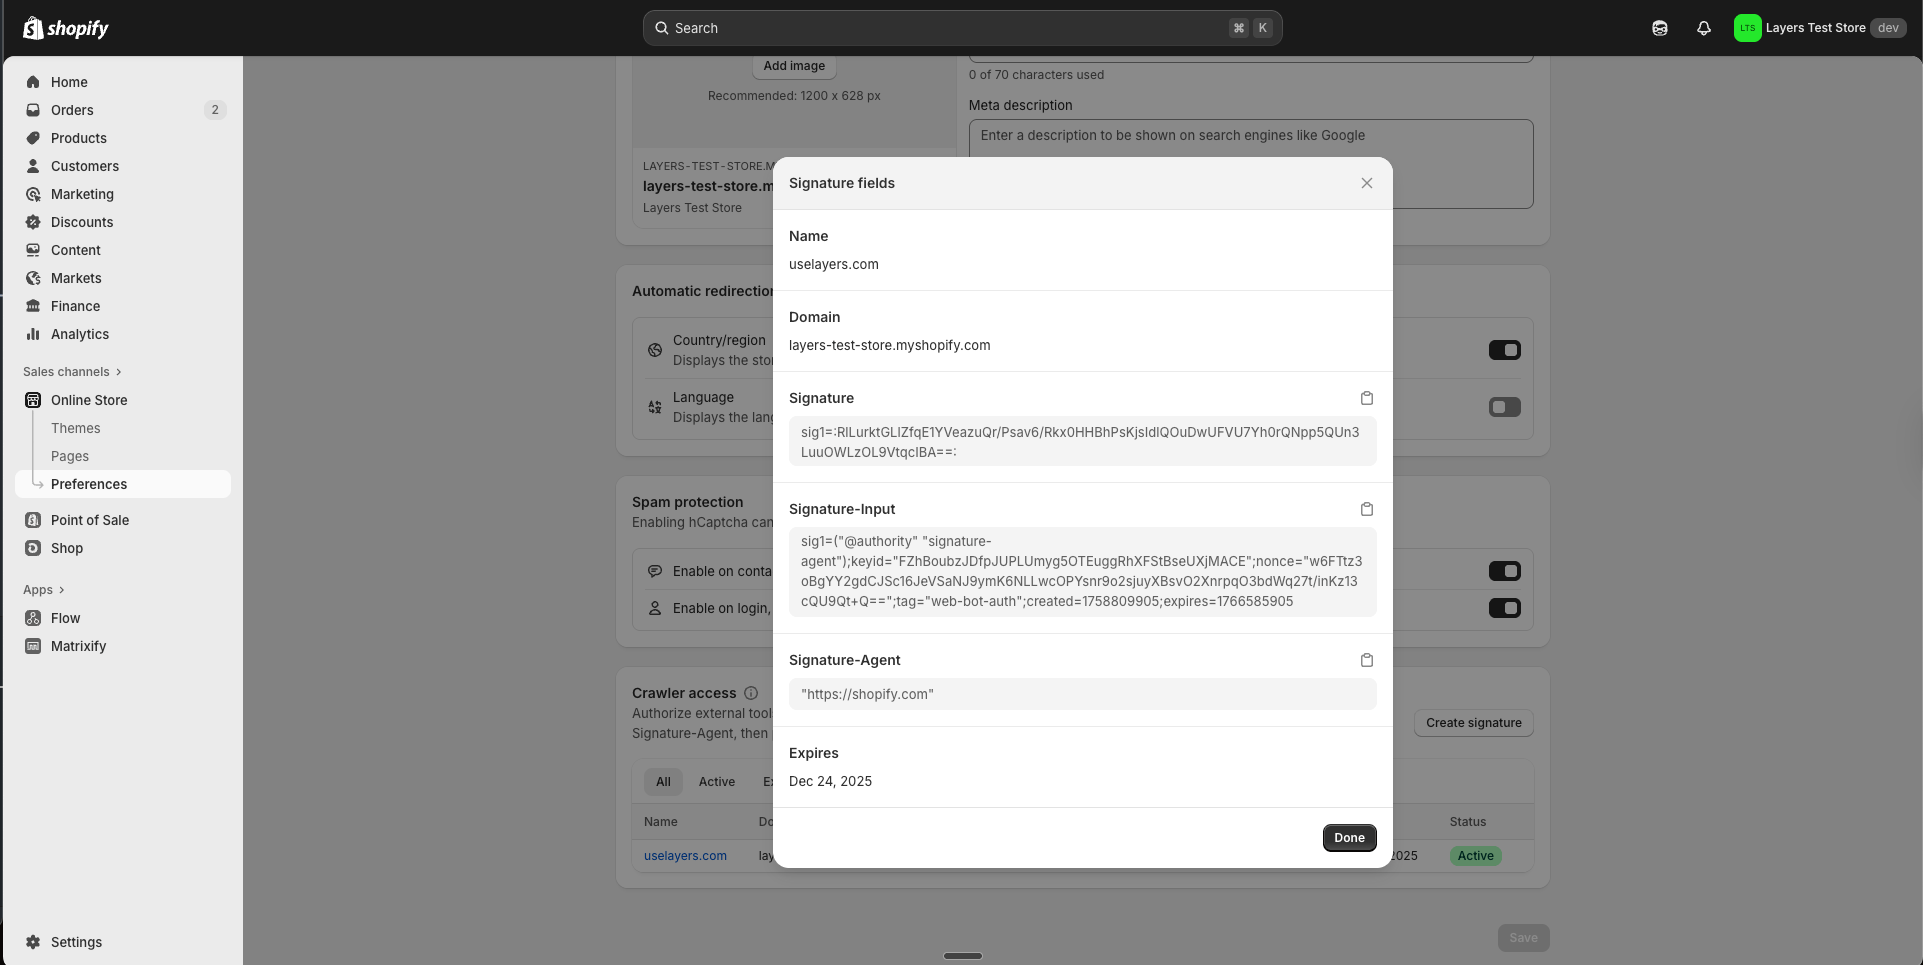
To expedite the sync of product media, you can create a crawler signature.-
Copy and send the following to Layers Support:
- Your signature input value
- Your signature value

Part 3: Export Search Data
Layers requires sample search data to seed your demo store.-
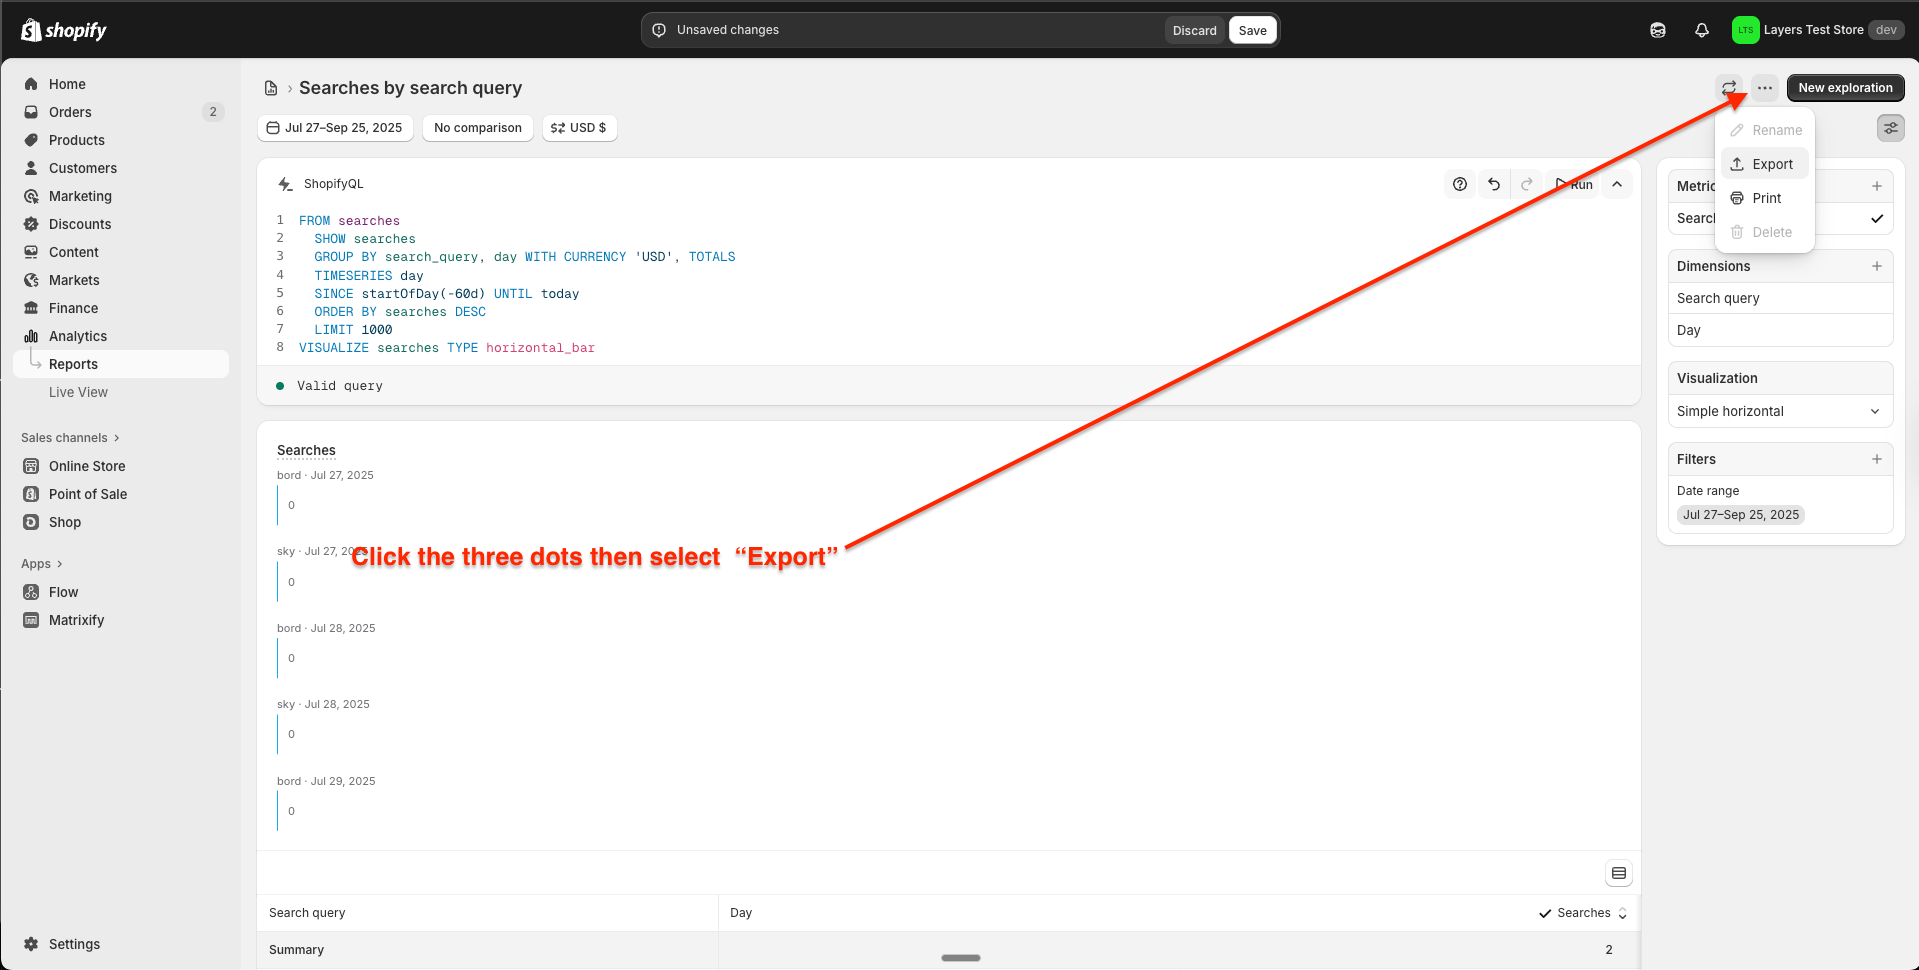
Run the following ShopifyQL query to export the top searches from the past 60 days:
-
Export the results as JSONL.

Next Steps
Once you’ve completed the steps above:- Send the credentials and exported files to Layers Support.
- Our team will finish setting up your demo store and notify you when it’s ready.