Creating and Managing Groups
Step 1: Create a Group
- In the Faceting tab, locate the Create group button at the top of the values list
- Click on the Create group button
- Enter a name for your new group (e.g., “Premium Brands”, “Popular Colors”)
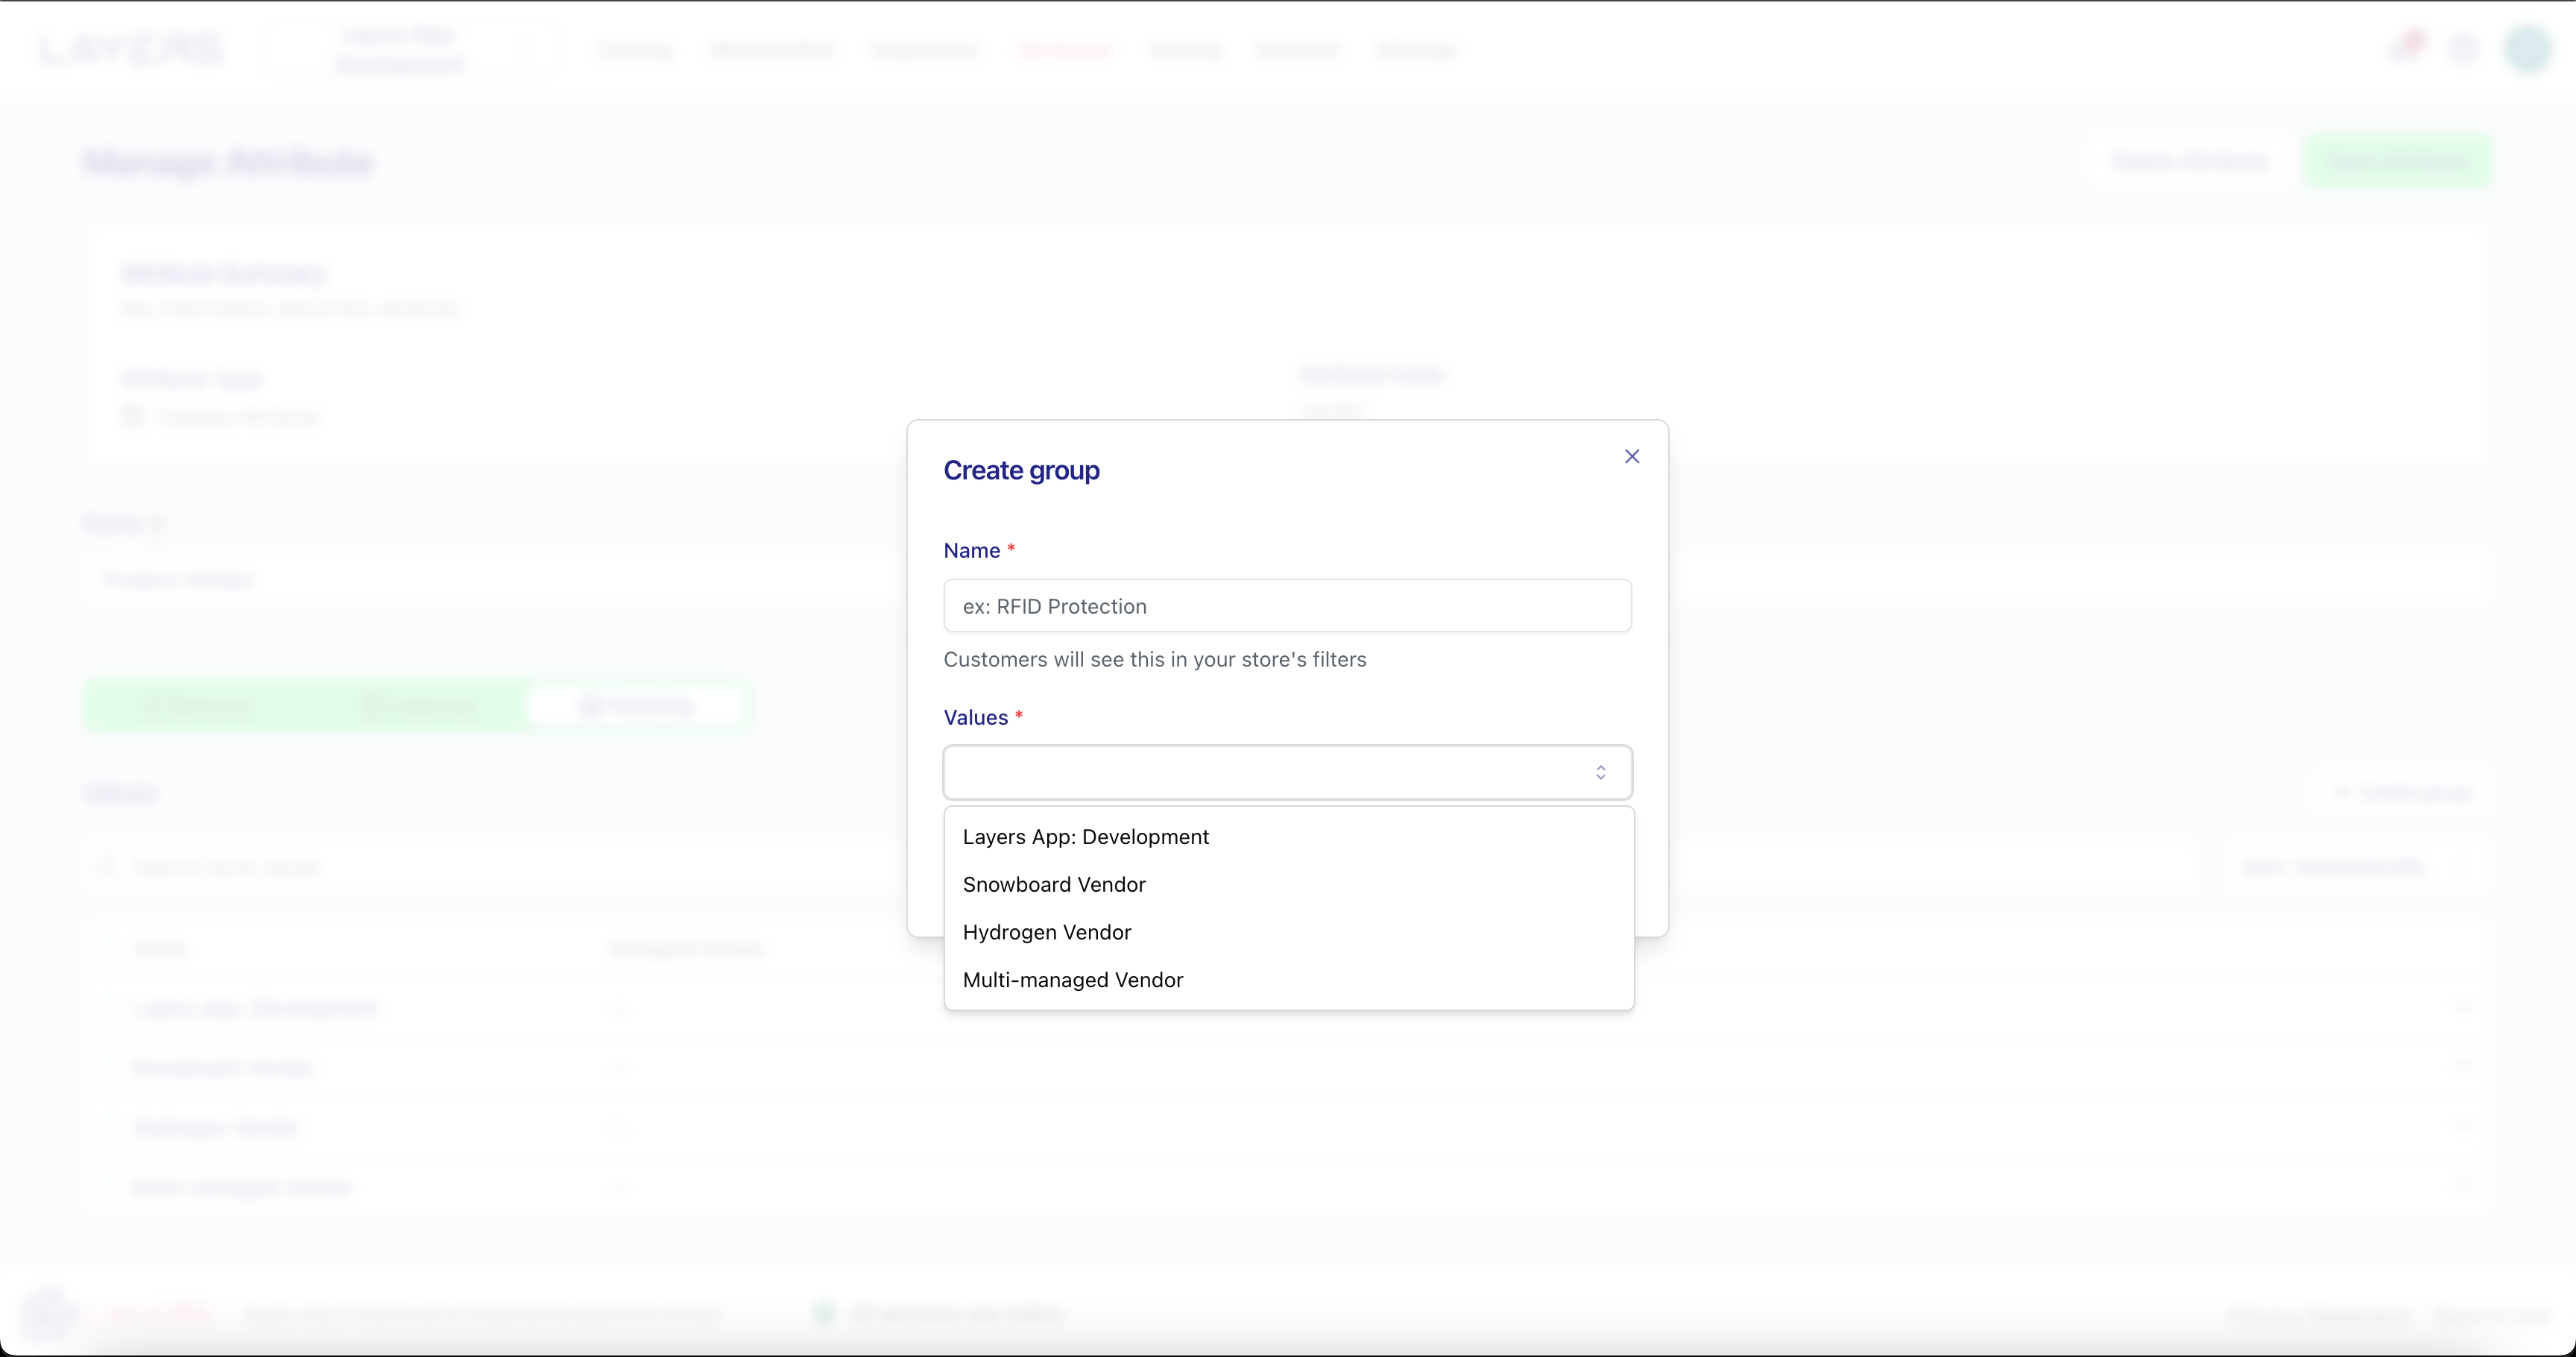
Step 2: Add Values to a Group
- Select the facet values you want to include in the group by checking the boxes next to them
- Click the Add to Group dropdown and select your group name
- The values will be moved into the group while maintaining their relative order
Step 3: Arrange Groups
- Groups can be reordered using the same drag handles as individual values
- You can expand or collapse groups in the management interface for easier editing
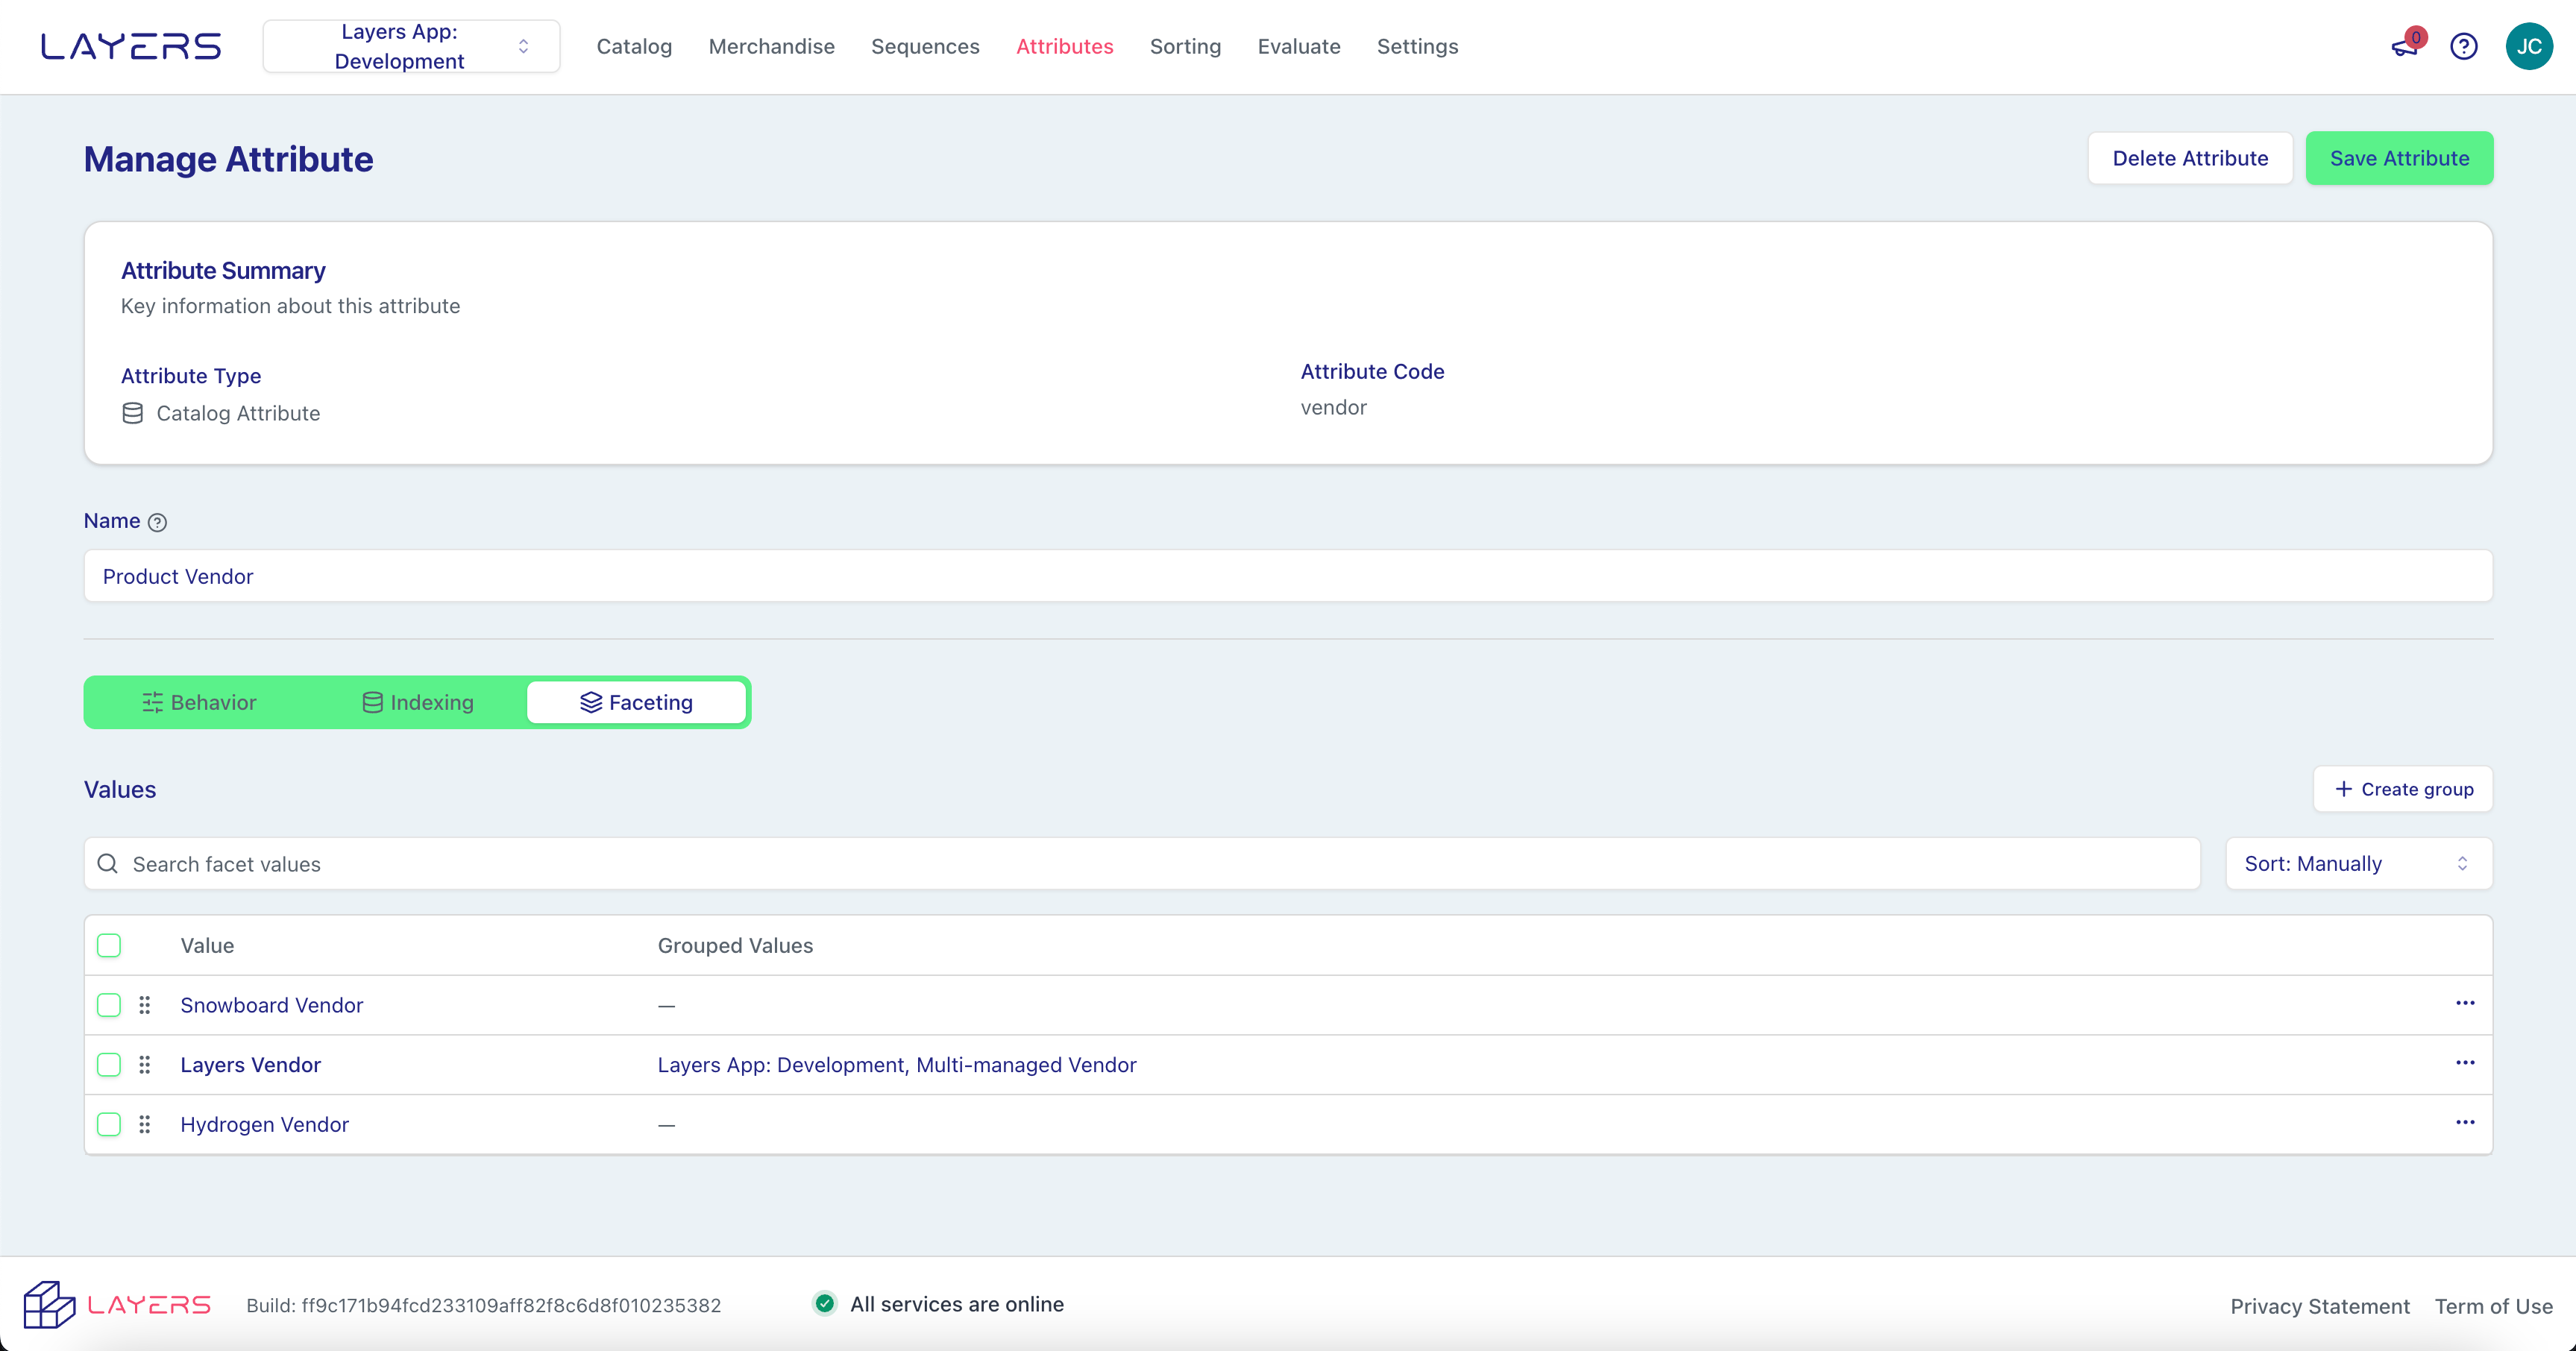
Step 4: Save Your Changes
After creating and organizing your groups, click the Save button to apply your changes.Best Practices
- Use clear, descriptive group names that help customers understand what’s in each group
- Limit group sizes to avoid overwhelming shoppers
- Group by themes (e.g., color families, brand tiers) that match how customers think
Example Scenarios
- Color: Group colors by shade families (Reds, Blues, Neutrals) for easier navigation
- Brand: Create groups for “Featured Brands”, “Local Brands”, and “International Brands”
- Size: For clothing, group by size categories (XS–S–M, L–XL–XXL)