Overview
Sort Orders determine the sequence in which products appear on collection pages. You can fine-tune product visibility using a combination of priority rules, product attributes, weighted attribute groups, and soft boost (Beta). These expressions help align product sorting with your marketing strategies and customer preferences.Priority Rules: Position-Based Behavior
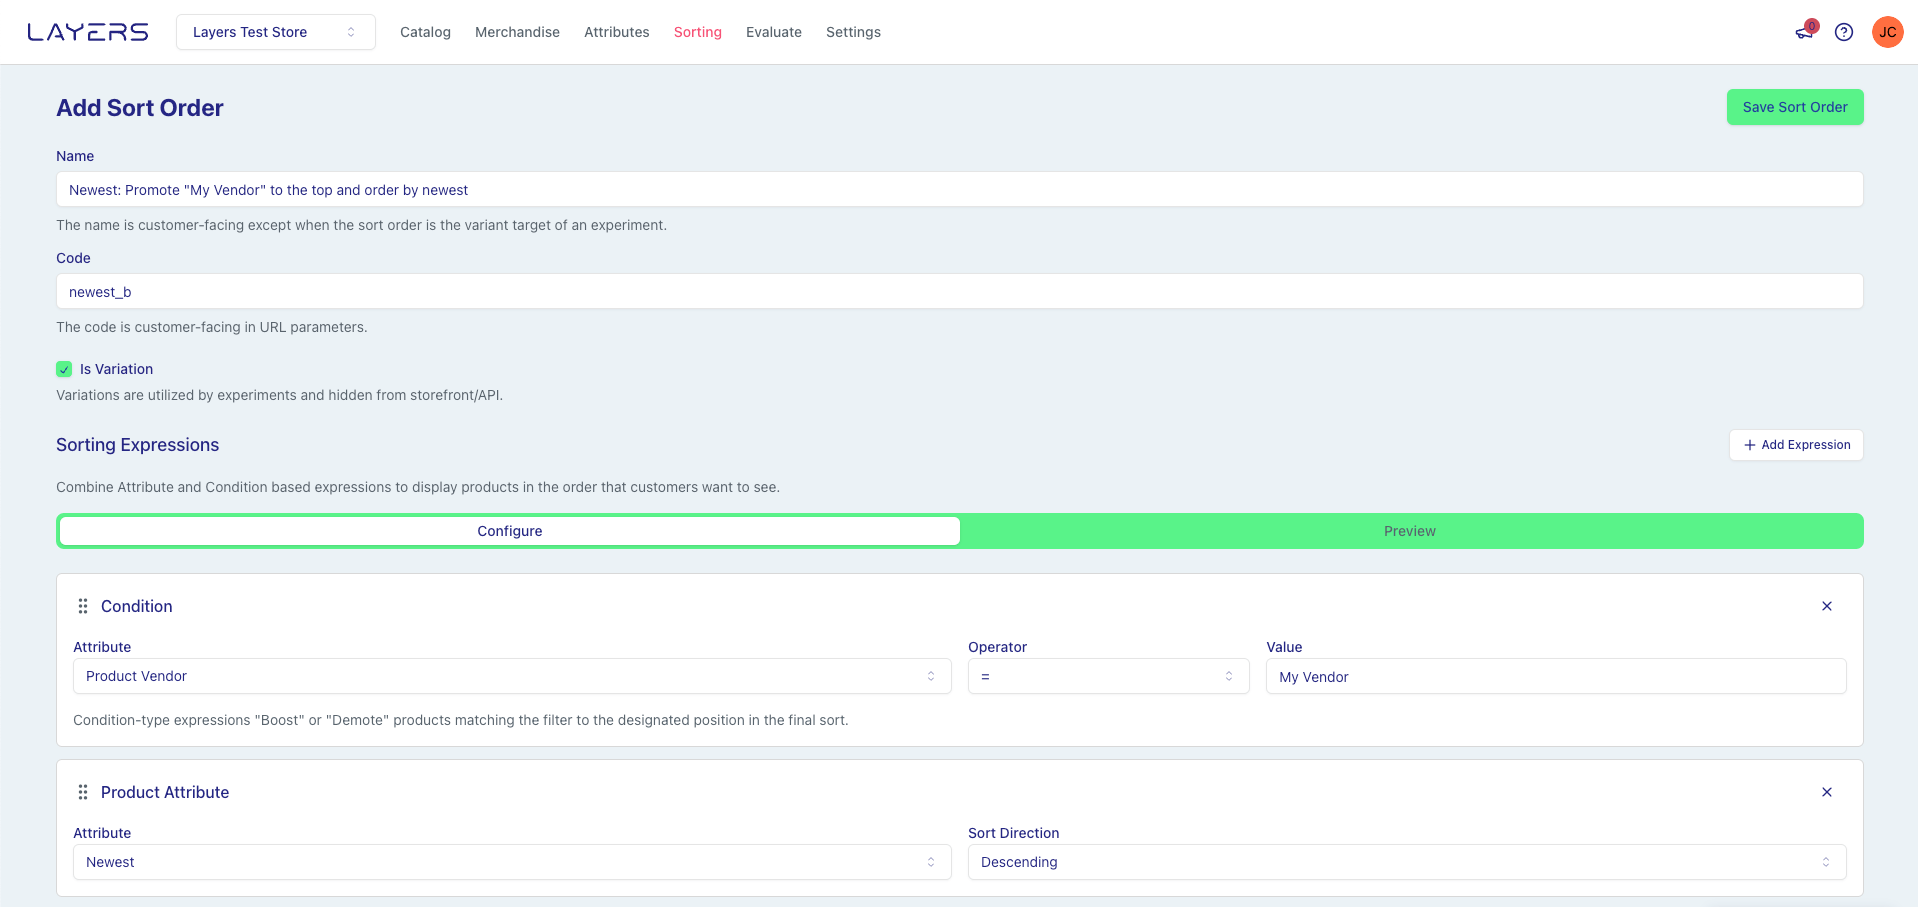
Priority rules use conditional logic to cluster matching products either at the top or bottom of results. The behavior depends on the rule’s position in your sort order:- First position: Promotes matching products to the top (DESC ordering - matching items first)
- Other positions: Demotes matching products to the bottom (ASC ordering - matching items last)
Enable as Storefront Sort
When creating or editing a sort order, you can control whether it is synced to Shopify as a metaobject using the Enable as Storefront Sort toggle. This option is enabled by default for regular sort orders, allowing them to be referenced in Shopify’s admin and Storefront API. Variant sort orders (used in experiments) automatically have this option disabled, as they are only used internally by the Layers API for A/B testing and do not need to be available in Shopify. When you toggle a sort order to be used as a variation, Enable as Storefront Sort is automatically disabled. Learn more about how sort orders are synced to Shopify in Metaobjects & Metafields.
Sort Order Architecture
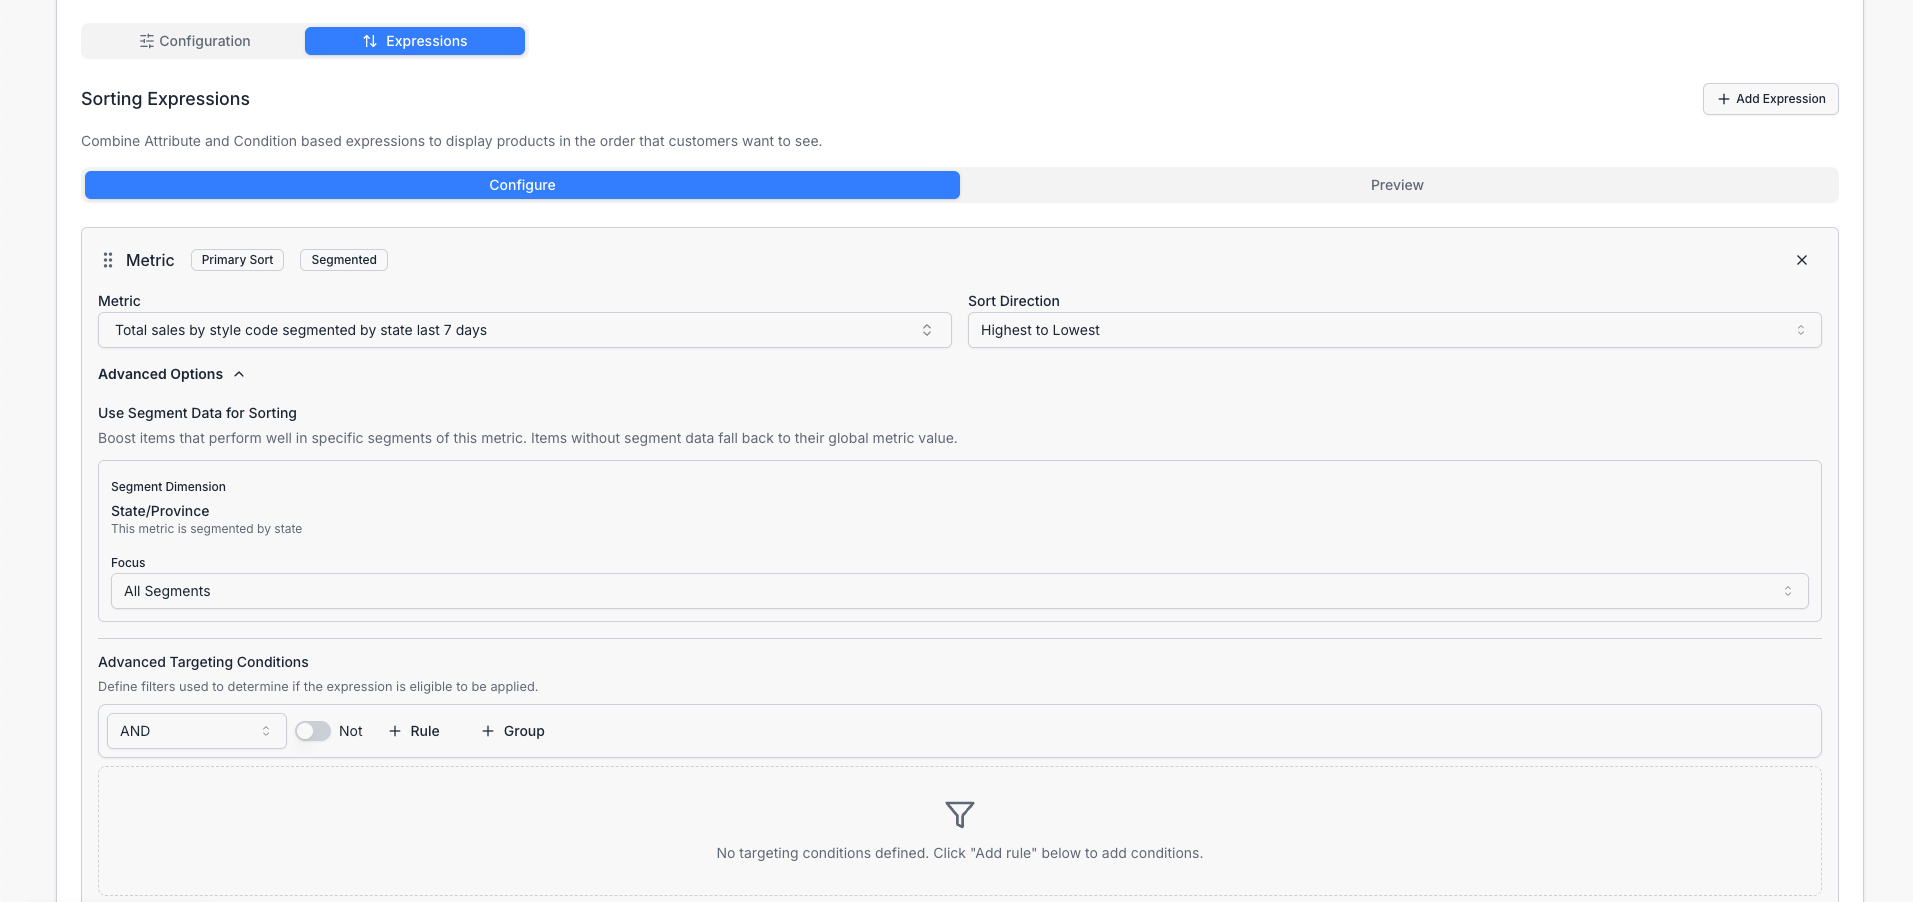
Sort Orders build upon the attribute foundation and can be enhanced with sequences, while being subject to merchandising rule overrides: Sort Orders can also leverage segmented metrics to automatically personalize product rankings based on visitor context like geographic location or marketing channel.Why Sort Orders Matter
Sort Orders shape how products are presented on collection pages so shoppers find the right items faster. Use priority rules, attributes, and weighted groups to reflect your brand strategy and customer preferences. For step‑by‑step instructions, see:- Create a sort order
- Preview a sort order
- Duplicate a sort order
- AI Sort Builder - Configure sort orders using natural language (Beta)
Common Sort Order Recipes
The platform provides pre-configured sort orders that implement common merchandising patterns. These can be used as-is or customized for your specific needs.Best Selling
Description: Sort by sales performance using 7-day revenue data. Products with highest revenue appear first. Dependencies: Automatically creates “Total Sales (7d)” metric if not present. Sorting Logic:- Primary: Metrics (Total Sales 7d) - Descending
- Products with highest 7-day sales rank first
Newest
Description: Sort by product creation date. Most recently published products appear first. Sorting Logic:- Primary: Published At - Descending
- Most recently published products rank first
Price: High to Low
Description: Sort by price in descending order. Most expensive products appear first. Sorting Logic:- Primary: Variant Price - Descending
- Highest priced products rank first
Price: Low to High
Description: Sort by price in ascending order. Least expensive products appear first. Sorting Logic:- Primary: Variant Price - Ascending
- Lowest priced products rank first
Soft Boost Sorting (Beta)
Soft Boost is a sorting technique that applies a decaying multiplier to boost products matching specific conditions. Unlike priority rules that cluster boosted products at the top, soft boost creates natural interleaving by applying a boost that decreases as the base sort value increases.Soft boost sorting is currently in beta. To join the beta program, contact your account manager or support team.
How Soft Boost Works
Soft boost supports two modes: multiplicative (default) and additive. Each mode uses a different formula to boost products matching specific conditions.Multiplicative Mode (Default)
Multiplicative mode applies a decaying multiplier to the base score. This produces natural interleaving because:- Products with low base scores get a larger relative boost (the exponential decay is minimal)
- Products with high base scores get a smaller relative boost (the exponential decay is significant)
- Non-matching products receive no boost (multiplier = 1)
Additive Mode
Additive mode adds a percentile-based value to the base score. The percentile value is computed from the Nth percentile of all base sort values, where N is the percentile target (e.g., 50 = median, 80 = 80th percentile). Key advantages:- Works with zero base values: Products with no sales data can still be boosted effectively
- Percentile-based targeting: Control where boosted products appear in the distribution
- Ideal for new arrivals: “Sprinkle” new products with no performance history into established rankings
- Boosting products with zero or near-zero base values (new arrivals, products with no sales)
- Creating a specific target position in the sort order (e.g., boost to 75th percentile)
- Sprinkling new products into a best-selling sort order without clustering them at the top
Soft Boost vs. Priority Rules
| Feature | Soft Boost | Priority Rules |
|---|---|---|
| Product Distribution | Natural interleaving throughout results | Clusters boosted products at top |
| Boost Behavior | Decaying multiplier based on base score | Fixed boost/demote logic |
| Use Case | Subtle promotion while maintaining organic ranking | Strong promotion or demotion |
| Configuration | Boost strength + decay rate | Condition + weight |
tags = 'featured':
- Priority Rule: All featured products appear first, regardless of sales
- Soft Boost: Featured products with low sales get a significant boost, but high-selling non-featured products can still rank higher
Configuration Parameters
Boost Mode
Determines the formula used to boost matching products.- Options:
multiplicative(default) oradditive - Default:
multiplicative
- Multiplies the base value by a boost factor
- Best for products with non-zero base values
- Uses
boost_strengthparameter
- Adds a percentile-based value to the base score
- Works even when base value is 0
- Uses
percentile_targetparameter - Ideal for new arrivals or products with no performance data
Boost Strength (Multiplicative Mode Only)
Controls the intensity of the initial boost. Higher values provide stronger boosts to matching products.- Range: 0 to 10
- Default: 0.25
- Recommended: 0.25 to 1.0 for subtle promotion, 1.0 to 2.0 for stronger effects
- Only used in multiplicative mode
- Product with base score 10 and Boost Strength 0.5:
10 × 1.409 = 14.09(+41%) - Product with base score 100 and Boost Strength 0.5:
100 × 1.184 = 118.4(+18%)
Percentile Target (Additive Mode Only)
Controls the target percentile for boosted products in additive mode. Products matching the condition will receive a boost that places them approximately at this percentile of the sort order.- Range: 0 to 100
- Default: 50
- Recommended: 50-75 for moderate visibility, 75-90 for high visibility
- Only used in additive mode
- Percentile target 50: Boosted products appear around the median position
- Percentile target 75: Boosted products appear in the upper quartile
- Percentile target 90: Boosted products appear near the top
Decay Rate
Controls how quickly the boost diminishes as the base score increases. Higher values make the boost decay more slowly.- Range: 1 and above
- Default: 100
- Recommended: 50-200 for multiplicative mode, 200-500 for additive mode
- Decay Rate 50: Boost decays faster, more aggressive interleaving
- Decay Rate 200: Boost decays slower, boosted products stay higher longer
- Decay Rate 500: Very slow decay, suitable for additive mode with sparse data
Configuration Requirements
Example Use Cases
Promote Featured Products Naturally (Multiplicative Mode)
Boost products tagged as “featured” while maintaining sales-based ranking:Sprinkle New Arrivals into Best Sellers (Additive Mode)
Interleave new arrivals with zero sales into a best-selling sort order:Highlight Recently Published Products (Multiplicative Mode)
Give recently published products a boost without completely overriding popularity:Regional Preference (Multiplicative Mode)
Boost products from specific vendors for certain markets:Works With Other Features
Soft boost integrates with other sort order capabilities:- Segmented Metrics: Apply soft boost to segmented metric scores for personalized boosting
- Sequences: Soft boost respects product sequences when enabled
- Multiple Attributes: Chain multiple soft boosts or combine with weighted sorting
Best Practices
- Choose the Right Mode: Use multiplicative mode for products with non-zero base values, additive mode for products with zero or near-zero values (like new arrivals)
- Start with Default Values: Begin with Boost Strength = 0.25 (multiplicative) or Percentile Target = 50 (additive) and Decay Rate = 100, then adjust based on results
- Test Different Parameters: Use sort order experiments to compare different boost configurations
- Monitor Distribution: Preview your sort order to ensure products are distributed as expected
- Avoid Over-Boosting: Keep Boost Strength below 1.0 for most use cases to maintain natural ranking
- Match Decay Rate to Score Range: Use higher decay rates (200-500) for additive mode or metrics with large value ranges
- Additive Mode for Zero Values: When boosting products with no performance data (new arrivals, products with no sales), always use additive mode
Priority Rule Examples
Promoting Products (First Position)
When a priority rule is in the first position, it promotes matching products to the top of results. Example: Promote Nike products- All Nike products appear first (regardless of sales)
- Within Nike products, sorted by sales
- Non-Nike products appear after, sorted by sales
Demoting Products (Other Positions)
When a priority rule is in any position other than first, it demotes matching products to the bottom of results. Example: Demote out-of-stock products- In-stock products appear first, sorted by sales
- Out-of-stock products appear at the bottom
Multiple Priority Rules
You can combine multiple priority rules to create sophisticated ranking logic: Example: Promote featured, demote out-of-stock- Featured products appear first (promoted)
- Regular in-stock products in the middle, sorted by sales
- Out-of-stock products at the bottom (demoted)
Priority Rules with Limit
Priority rules support alimit parameter to control how many matching products are promoted or demoted:
Example: Promote top 5 new arrivals
- Top 5 newest products appear first
- Remaining products sorted by sales (including other new products beyond the limit)
Best Practices
- Balance Weights: Avoid extreme weight differences to ensure fair influence of attributes.
- Monitor Impact: Regularly review conversion rates and customer behavior to refine sorting strategies.
- Use Priority Rules Wisely: Place priority rules in the first position to promote products, or in other positions to demote them. Consider the position carefully to align with merchandising goals.
- Leverage Recipes: Start with pre-configured sort orders and customize them based on your specific merchandising goals.
- Test Position Changes: Use sort order experiments to test whether promoting or demoting specific products improves conversion rates.
Using Segmented Metrics in Sort Orders
Segmented metrics enable automatic personalization of product rankings based on each visitor’s context. When you include a segmented metric in a sort order, the system intelligently selects the most relevant metric value for each visitor without requiring separate sort orders for different audiences.How It Works
When you add a segmented metric to a sort order, the system automatically uses the visitor’s context to select the appropriate metric value. For a visitor from the United States, the system uses US-specific performance data when available. For a visitor from Canada, it uses Canadian data. If segment-specific data isn’t available, the system falls back to the overall value, ensuring all visitors see ranked results. This happens transparently at query time. You configure the segmentation once in your metric and sort order, and the system handles all the complexity of matching visitor context to the right data.Smoothing Factor
The smoothing factor controls how segment-specific and global performance data are blended when ranking products. This parameter helps balance the responsiveness of segment-specific rankings with the stability of global trends. How it works: When a segmented metric is used in a sort order, the system calculates a weighted blend of segment-specific data and global data for each product:- 1-50 (Segment-focused): Use when you have sufficient data in each segment and want rankings to closely reflect segment-specific performance. Best for high-traffic stores with established regional patterns.
- 50-100 (Balanced): The default range balances segment-specific insights with global trends. Suitable for most use cases where you want personalization without excessive volatility.
- 100-200 (Global-focused): Use when segment data is sparse or when you want rankings to remain stable across segments. Best for new stores, low-traffic segments, or when testing segmentation.
- Geographic segmentation with high traffic: Set smoothing factor to 25-50 to prioritize country-specific performance data
- Marketing channel segmentation with limited data: Set smoothing factor to 100-150 to blend channel-specific trends with overall performance
- New segment with minimal data: Set smoothing factor to 150-200 to rely primarily on global performance until segment data accumulates
Benefits
Segmented metrics in sort orders deliver more relevant product rankings to different audiences:- Geographic relevance: Products that perform well in a visitor’s country or region rank higher for that visitor
- Channel optimization: Visitors from paid ads see rankings optimized for paid traffic, while organic visitors see organic-optimized rankings
- Automatic adaptation: Rankings adjust to each visitor without manual intervention or duplicate sort orders
Works With Other Features
Segmented metrics integrate seamlessly with other sort order capabilities:- Weighted sorting: Combine multiple segmented metrics with different weights to create sophisticated ranking algorithms
- Conditional rules: Apply segmented metrics only when specific conditions are met
- Priority rules: Use segmented metrics alongside boost and demote logic for fine-tuned control

Learn More
- Metrics - Understanding segmented metrics
- Create a sort order - Step-by-step guide
- Preview a sort order - Test with different contexts
- Contextual Information - What visitor context is available
- LayersQL Syntax - SEGMENT BY clause details
Sort Order Experiments
Sort Order Experiments allow you to A/B test different sort orders across your storefront APIs to determine which arrangement of products leads to better engagement and conversion rates.Overview
With Sort Order Experiments, you can:- Create A/B tests for different sort orders across Browse, Text Search, Image Search, and Similar Products APIs
- Target specific collections (for Browse experiments) or run experiments across all search requests
- View detailed metrics on how each variation performs
- Make data-driven decisions about which sort orders to implement

Supported API Types
Experiments can target any of the following API types:- Browse: Test sort orders on collection pages. You can target specific collections or all collections.
- Text Search: Test sort orders for text-based search queries across your entire catalog.
- Image Search: Test sort orders for image-based visual search results.
- Similar Products: Test sort orders for similar product recommendations.
Running Experiments
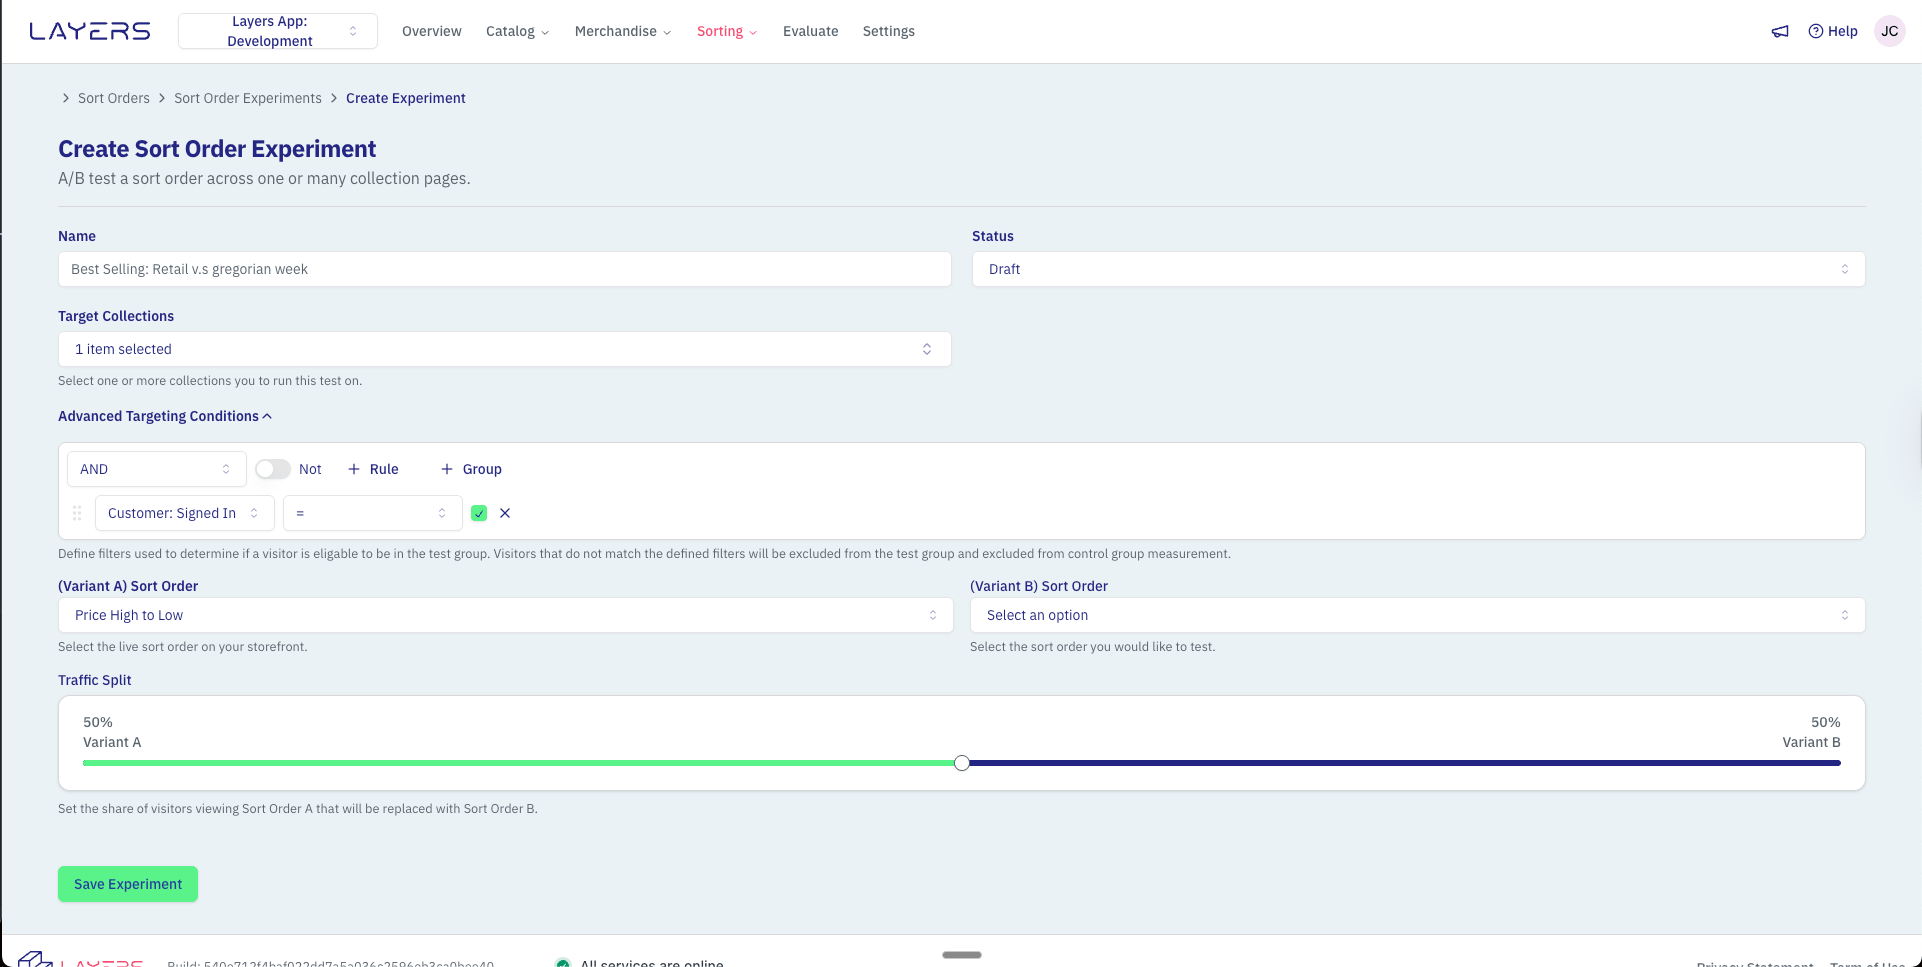
Use experiments to compare a base sort order with a variant and see which performs better. Set a traffic split, configure targeting, and monitor results to make data-driven decisions.Experiment Settings
- Name: A descriptive name to identify your experiment
- Target API Type: The API to run the experiment on (Browse, Text Search, Image Search, or Similar Products)
- Base Sort Order: The current sort order that will be shown to the control group
- Variant Sort Order: The new sort order that will be shown to the test group
- Collections: For Browse experiments only, select all collections, a single collection, or multiple specific collections to target
- Traffic Split: Percentage of traffic that will see each variation (default is 50/50)
- Advanced Targeting Conditions: Optional filters to determine which visitors are eligible for the experiment (e.g., UTM parameters)
Monitoring Experiments
Once your experiment is running, you can monitor its performance in the experiment results section within the sort order:- Visitors: Number of visitors in each group
- Views: Product views in each group
- Clicks: Product clicks in each group
- Add to Carts: Number of products added to cart in each group
- Purchases: Number of purchases in each group
- Conversion Rate: Percentage of visitors who made a purchase
- Confidence Level: Statistical confidence in the results
Ending an Experiment
You can end an experiment at any time:- Navigate to the Sort Orders section in your Layers dashboard
- Select the sort order containing the experiment
- Click on the “Experiments” tab
- Click “End Experiment” for the experiment you want to conclude
- Review the final results
- Implement the winning sort order if desired
Advanced Usage
UTM-Based Sorting
You can use experiments with a 100% traffic split and advanced targeting priority rules to show different sort orders based on UTM parameters. This allows you to create specialized landing experiences for different marketing campaigns. For example, you could set up an experiment that shows a special sort order only to visitors coming from a specific email campaign by targeting the UTM source and campaign parameters.API-Specific Experiments
Each experiment targets a specific API type, allowing you to run independent experiments across different parts of your storefront. For example, you could simultaneously run a Browse experiment on your collection pages and a Text Search experiment on your search results, each with different sort order variations. This targeted approach enables you to optimize each discovery channel independently and measure the impact of sort order changes on specific user journeys.Best Practices
Run Experiments Long Enough
Run Experiments Long Enough
Allow experiments to run until they reach statistical significance (usually indicated by a high confidence level).
Test One Variable at a Time
Test One Variable at a Time
For clearest results, only test one change at a time. If you want to test multiple sort orders, run separate experiments.
Consider Seasonality
Consider Seasonality
Be aware that seasonal factors may influence your results. Consider running experiments during typical periods for your business.
Review All Metrics
Review All Metrics
Don’t focus solely on one metric. Look at the full picture including views, clicks, add-to-carts, and purchases.