> ## Documentation Index
> Fetch the complete documentation index at: https://docs.uselayers.com/llms.txt
> Use this file to discover all available pages before exploring further.
# Exporting search data
> Layers seeds historical search data automatically on install. Use this manual ShopifyQL export only when you need to supply searches the import missed.
As of mid-2026, Layers seeds historical search data automatically on install by reading the last 30 days of search terms directly from your Shopify storefront. You do not need to run the manual export below for a typical install. Use this guide only if the support team asks you to, or if you want to supply searches that the automatic import didn't cover.
When you install Layers, the [onboarding bootstrap](/help/onboarding/install#what-layers-seeds-automatically) imports your top searches from Shopify, builds the initial query clusters, drafts an autocomplete prompt, and runs a baseline evaluation — all without any export step from you.
You only need to run the manual export below in a few cases:
* The automatic import returned very few terms (for example, the store is brand new on Shopify and has limited search history).
* You want to seed a longer window of history (the automatic import covers the last 30 days; the manual export below covers 60).
* Layers Support asks you to provide a JSONL export for an investigation.
## Prerequisites
* You have a Shopify store with Layers installed.
* You have access to **Shopify Analytics** in your Shopify admin.
## Export your top searches
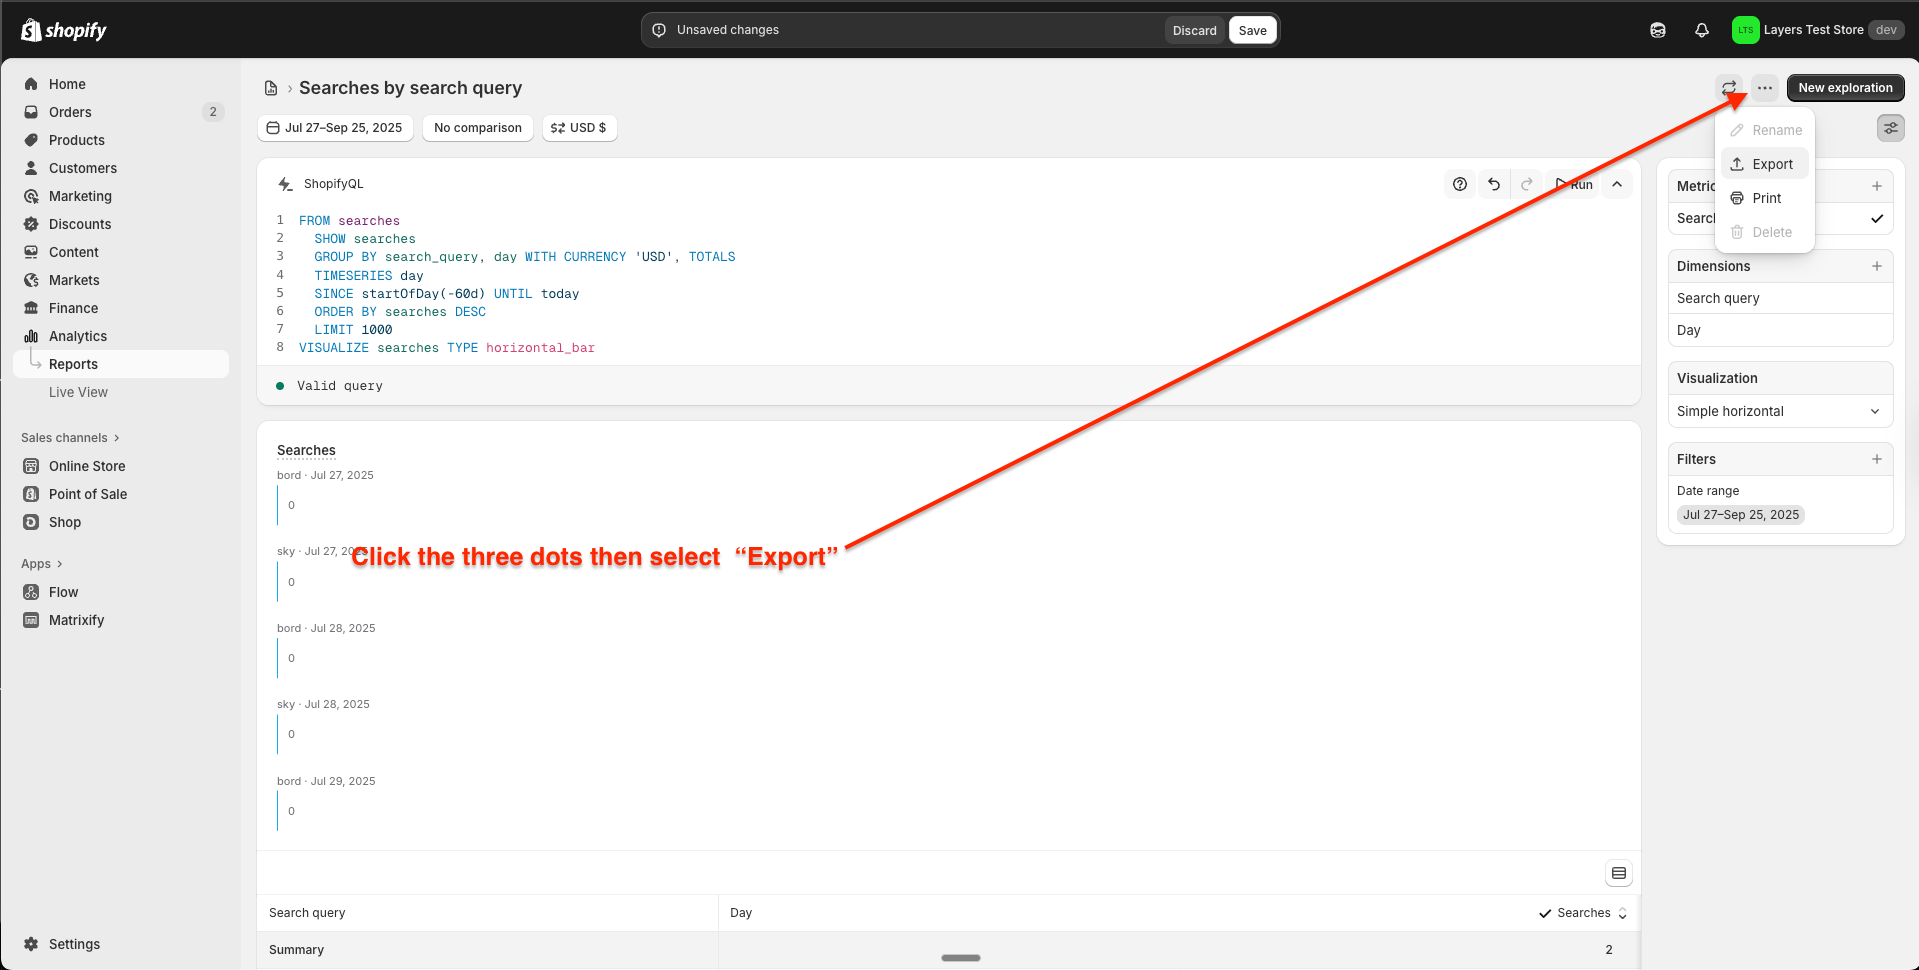
1. In your Shopify admin, go to **Analytics → Reports**.
2. Open the ShopifyQL editor and run the following query to export the top searches from the past 60 days:
```sql theme={null}
FROM searches
SHOW searches
GROUP BY search_query, day WITH CURRENCY 'USD', TOTALS
TIMESERIES day
SINCE startOfDay(-60d) UNTIL today
ORDER BY searches DESC
LIMIT 1000
VISUALIZE searches TYPE horizontal_bar
```
3. Export the results as **JSONL**.
 ## Upload the export
Upload the JSONL file yourself from **Settings → Sample Data → Upload Sample Data**. Layers validates the format in the browser and processes the file in the background. See [Seeded search data](/help/configuration/configure-search-behavior#seeded-search-data) for the required field format and upload steps.
If you cannot upload the file — for example because you need Layers to merge it with an existing seed — send it to [Layers Support](mailto:support@uselayers.com) instead.
## Next steps
* Return to the [Demo store setup](/help/onboarding/setting-up-a-demo-store) guide to complete your store configuration.
* Learn more about how Layers uses search data in [Metrics](/platform/metrics).
## Troubleshooting
If you are unable to run the ShopifyQL query or export the results, make sure you have the required permissions in your Shopify admin. [Contact support](mailto:support@uselayers.com) if you need help.
## Upload the export
Upload the JSONL file yourself from **Settings → Sample Data → Upload Sample Data**. Layers validates the format in the browser and processes the file in the background. See [Seeded search data](/help/configuration/configure-search-behavior#seeded-search-data) for the required field format and upload steps.
If you cannot upload the file — for example because you need Layers to merge it with an existing seed — send it to [Layers Support](mailto:support@uselayers.com) instead.
## Next steps
* Return to the [Demo store setup](/help/onboarding/setting-up-a-demo-store) guide to complete your store configuration.
* Learn more about how Layers uses search data in [Metrics](/platform/metrics).
## Troubleshooting
If you are unable to run the ShopifyQL query or export the results, make sure you have the required permissions in your Shopify admin. [Contact support](mailto:support@uselayers.com) if you need help.